How to reach us

02-026-3147

social media

custom printing services for Digital Hot Foil Business Cards

Print Digital Hot Foil Business Cards

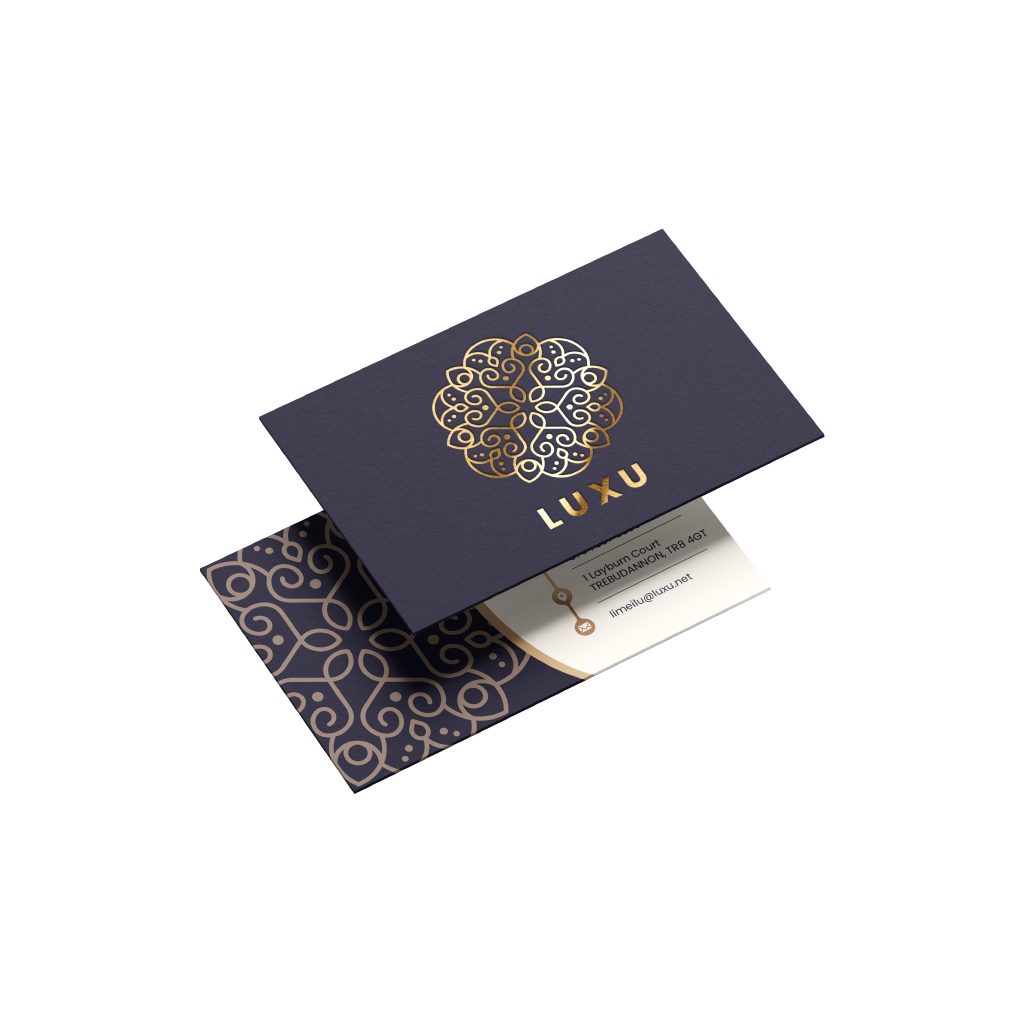
Digital Hot Foil Business Cards are one of the most versatile marketing tools for any business. They are a quick and inexpensive way to share your contact details with business partners or new potential clients and play an important role in creating a lasting first impression.

Select one of the options below to get started

Upload Your Design

Click here to select your product options and to upload your print-ready artwork.

Let Us Design Or Adjust Your Artwork

Click here if you want us to design or you need help to create a ready-to-print file (e.g. editing of formatting).

Browse Our Templates

Select this option to browse our templates and create your artwork online

Don't know where to start from?

Play Video
Step 1Choose Your Options
Need help configuring your product or preparing your artwork?
10400, BANGKOK
Digital Hot Foil Business Cards
Format
Choose Format
Can't find the size you need?
Infos & TipsDigital Hot Foil Business Cards are premium cards that seamlessly blend stunning visual appeal with a touch of elegance, making them an ideal choice for those looking to make a lasting impression. The digital hot foil process allows for precise application of metallic foils, which can be used to highlight logos, text, or intricate design elements with a radiant shine. This technique not only adds a luxurious finish to your business cards but also creates a sense of sophistication and exclusivity, elevating your brand's image.
Choose from our standard sizes, each offering its own canvas for creativity, perfect for making a lasting impression in any professional setting.
How to choose the perfect fit?If you have a design, verify its dimensions using Adobe Acrobat's 'Check Document Property' function; discover more details here. Don't have a design yet? Utilize our templates tailored for the specified sizes.
Side Of Print
Choose Side Of Print
Infos & TipsSelect single or double-sided printing for your product.
How to choose your option?For single-sided printing, only one side of your item will be printed with artwork, Whereas, if both sides printing is selected, both sides of your item will have printed artwork.
Paper Type
Choose Paper Type
Infos & TipsExplore our different card materials, each uniquely tailored to cater to your specific needs and preferences.
Which material should I choose?Discover our 350g Art Card Glossy, perfect for a smooth, professional finish that catches the eye. For a balance of thickness and elegance, our 300g Art Card Glossy offers premium quality and shine. If you prefer a sophisticated, non-reflective look, our 300g Art Card Matte provides a refined, elegant surface. Whatever your project demands, find the perfect material to make your creations stand out effortlessly.
Hot Foil Options
Choose Hot Foil Options
Infos & TipsWe offer different colors and sides for your hot foil finishings.
Which material should I choose?Discover our Gold Hot Foil Front Only, perfect for adding a touch of elegance and luxury to the front of your designs. For an all-around stunning effect, our Gold Hot Foil Front & Back offers a consistent, premium finish on both sides. If you prefer a sleek and modern look, our Silver Hot Foil Front Only provides a sophisticated shine to the front. For a complete, polished presentation, our Silver Hot Foil Front & Back delivers a high-end, professional appearance on both sides. Whatever your project demands, find the perfect finishing to make your creations stand out effortlessly.
Step 2

Choose a Quantity & Delivery Date

Please select the price below to see the cutoff time.
Quantities
Get It By
Sat, 2 Nov
100 pcs
200 pcs
300 pcs
500 pcs
1,000 pcs
2,000 pcs
Can't find the quantity you're looking for? You can add a custom quantity you want
Set Custom Quantity

Product's quantity must be more than 200 pcs and less than 5,000 pcs. In the multiples of 1

Details about ordering Hot Foil Business Cards

  • Please note if your artwork has small and fine details that you would like to hot stamp. please refer to this product instead, Hot Foil Business Cards (Fine Details)
  • Read our artwork preparation instructions to set up your file the right way
  • Please note that there is no lamination option available for this Hot Foil Business Cards
Information
Artwork Preparation

  • 1.

  • 2. Add 3 mm of bleed

    During the production of paper products, cutting imperfections are to be expected - cutting can be off by a couple of millimeters from the cutting line. To allow leeway for such imperfections, you should add 3 mm of bleed on all edges of your artwork. Make sure that all colors, background pictures, and elements extend to the edge of the bleed area, to avoid the appearance of while borders on certain edges after cutting. Learn more how to set up the bleed here.

  • 3. Keep your content within a 3 mm safety margin

    To ensure that no important elements (text, graphics, images) get cut off from your paper product, make sure to keep such elements at least 3 mm away from the edge of your finished product dimensions.Click here to know how to set up 3 mm safety margin.

  • 4. Use CMYK color mode

    Except for silkscreen and pad printing, files should be prepared in CMYK color mode. Keep in mind that if the setup is wrong, colors on the finished product may differ from the file you sent. Here is how to set your artwork to CMYK color mode in Adobe Illustrator.

  • 5. Use an image resolution of at least 300 DPI

    To avoid blurriness, use only images and graphics that have a resolution of 300 DPI or more. Before sending your files, make sure to embed your images into the file. Read more about how to check the resolution of your assets.

  • 6. Use the right values for gray elements

    When setting up grey elements, set K to a percentage between 0 and 100, and keep all other colors (C, M, and Y) equal to 0%.

  • 7. Use the right values for black elements

    When setting up black text, thin lines and small elements, use pure black, i.e. C = 0, M = 0, Y = 0, K = 100). Text, thin lines, and small elements in pure black color should be set to overprint to avoid white gaps around the text. For larger elements, use a composite form of black (we recommend C = 30, M = 0, Y = 0, K = 100).

  • 8. Use maximum 2 colors for lines that are finer than 2 pt

    If lines are 2 pt thick or less, use only 1 or 2 colors. 4 colors may be used for thicker lines.

  • 9. Convert all fonts to outlines, or embed them in your file

    To avoid issues with fonts when submitting your file(s), make sure to convert fonts to outlines, or to embed all fonts when saving to PDF.

  • 10. Save and upload your artwork files as PDF/X-1a

    The best format for submitting print-ready files is PDF, under the PDF/X-1a standard. Where possible, submit your files in PDF format. See why PDF/X-1a is the right format for printing.

  • 11. Check for overprint

    Make sure that no elements are set on overprint, unless you need them to be.

Templates
FAQ

  • 1. Which production techniques are used?

    We only use digital printing technique for this Business cards.

  • 2. How will my n be delivered?

    All of our products are delivered in a securely packed cardboard box.

  • 3. I can't find what I'm looking for. Can I request a quote?

    If you can't find what you need, please call our customer service team at 02-026-3147 to help you place an order. You can also request a quote from our customer service team for special product configurations that are not available on our website.

  • 4.

  • 5.

  • 6. How does lamination affect my product?

    Glossy lamination will reflect light, giving it a shiny appearance and making the colors in your images "pop". In contrast, matte lamination removes any light reflection, giving it a look of high-class and a smooth feeling.

    All laminated products will help repel dust and dirt and they can easily be wiped clean.

    Please note that while lamination helps in protecting your product and increase its longevity, it can also result in slight color variations of your artwork.

  • 7. How can I upload my files?

    If your artwork contains more than one page, you can either upload a single file which contains all pages, or upload separate files each containing one page. Your file(s) can be uploaded either before you checkout and pay, or after. Please note that uploading files late might result in a moved expected delivery date.

  • 8. Which formats can I upload?

    The best format for submitting print-ready files is PDF, under the PDF/X-1a standard. Learn how to save your artwork using PDF/X-1a standard in Adobe Illustrator. However you can also upload your file in JPEG, PNG, PSD, EPS, TIFF or AI format for an additional fee of THB 50.00. Our graphic designers will then convert your file into a print-ready PDF file.

Guides and Tools

Everything you need to know to get your Artwork ready

  • 1.

  • 2. Add 3 mm of bleed

    During the production of paper products, cutting imperfections are to be expected - cutting can be off by a couple of millimeters from the cutting line. To allow leeway for such imperfections, you should add 3 mm of bleed on all edges of your artwork. Make sure that all colors, background pictures, and elements extend to the edge of the bleed area, to avoid the appearance of while borders on certain edges after cutting. Learn more how to set up the bleed here.

  • 3. Keep your content within a 3 mm safety margin

    To ensure that no important elements (text, graphics, images) get cut off from your paper product, make sure to keep such elements at least 3 mm away from the edge of your finished product dimensions.Click here to know how to set up 3 mm safety margin.

  • 4. Use CMYK color mode

    Except for silkscreen and pad printing, files should be prepared in CMYK color mode. Keep in mind that if the setup is wrong, colors on the finished product may differ from the file you sent. Here is how to set your artwork to CMYK color mode in Adobe Illustrator.

  • 5. Use an image resolution of at least 300 DPI

    To avoid blurriness, use only images and graphics that have a resolution of 300 DPI or more. Before sending your files, make sure to embed your images into the file. Read more about how to check the resolution of your assets.

  • 6. Use the right values for gray elements

    When setting up grey elements, set K to a percentage between 0 and 100, and keep all other colors (C, M, and Y) equal to 0%.

  • 7. Use the right values for black elements

    When setting up black text, thin lines and small elements, use pure black, i.e. C = 0, M = 0, Y = 0, K = 100). Text, thin lines, and small elements in pure black color should be set to overprint to avoid white gaps around the text. For larger elements, use a composite form of black (we recommend C = 30, M = 0, Y = 0, K = 100).

  • 8. Use maximum 2 colors for lines that are finer than 2 pt

    If lines are 2 pt thick or less, use only 1 or 2 colors. 4 colors may be used for thicker lines.

  • 9. Convert all fonts to outlines, or embed them in your file

    To avoid issues with fonts when submitting your file(s), make sure to convert fonts to outlines, or to embed all fonts when saving to PDF.

  • 10. Save and upload your artwork files as PDF/X-1a

    The best format for submitting print-ready files is PDF, under the PDF/X-1a standard. Where possible, submit your files in PDF format. See why PDF/X-1a is the right format for printing.

  • 11. Check for overprint

    Make sure that no elements are set on overprint, unless you need them to be.

  • 1. Which production techniques are used?

    We only use digital printing technique for this Business cards.

  • 2. How will my n be delivered?

    All of our products are delivered in a securely packed cardboard box.

  • 3. I can't find what I'm looking for. Can I request a quote?

    If you can't find what you need, please call our customer service team at 02-026-3147 to help you place an order. You can also request a quote from our customer service team for special product configurations that are not available on our website.

  • 4.

  • 5.

  • 6. How does lamination affect my product?

    Glossy lamination will reflect light, giving it a shiny appearance and making the colors in your images "pop". In contrast, matte lamination removes any light reflection, giving it a look of high-class and a smooth feeling.

    All laminated products will help repel dust and dirt and they can easily be wiped clean.

    Please note that while lamination helps in protecting your product and increase its longevity, it can also result in slight color variations of your artwork.

  • 7. How can I upload my files?

    If your artwork contains more than one page, you can either upload a single file which contains all pages, or upload separate files each containing one page. Your file(s) can be uploaded either before you checkout and pay, or after. Please note that uploading files late might result in a moved expected delivery date.

  • 8. Which formats can I upload?

    The best format for submitting print-ready files is PDF, under the PDF/X-1a standard. Learn how to save your artwork using PDF/X-1a standard in Adobe Illustrator. However you can also upload your file in JPEG, PNG, PSD, EPS, TIFF or AI format for an additional fee of THB 50.00. Our graphic designers will then convert your file into a print-ready PDF file.