How to reach us

+65 3159 3040

social media

Print Sticker Rolls (Small Sizes Below 3x3 cm)

Starting from S$126.00

Sticker Roll (For Sizes Below 3x3 cm) are one of the most versatile marketing tools for any business. They are a quick and inexpensive way to share your contact details with business partners or new potential clients and play an important role in creating a lasting first impression.

Select one of the options below to get started

Upload Your Design

Click here to select your product options and to upload your print-ready artwork.

Let Us Design Or Adjust Your Artwork

Click here if you want us to design or you need help to create a ready-to-print file (e.g. editing of formatting).

Browse Our Templates

Select this option to browse our templates and create your artwork online

Don't know where to start from?

Play Video
ขั้นตอนที่ 1เลือกตัวเลือกของคุณ
ต้องการความช่วยเหลือในการกำหนดค่าหรือเตรียมไฟล์งานของคุณหรือไม่?
Singapore
Sticker Roll (For Sizes Below 3x3 cm)
รูปแบบ
เลือกรูปแบบ
กำหนดขนาดใหม่ด้วยตัวเอง
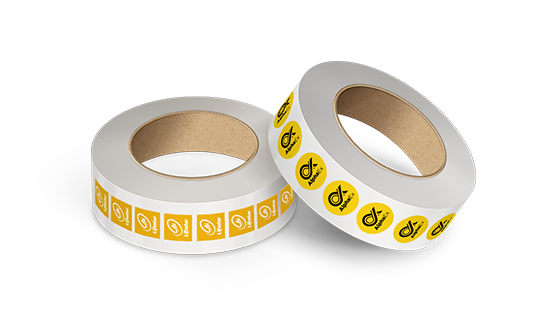
ข้อมูลและคำแนะนำ
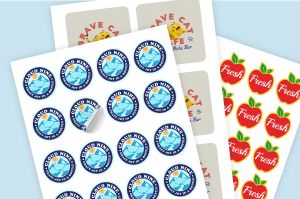
A sticker roll (for sizes below 3x3 cm) is a continuous roll of small adhesive labels, typically used for mass application, easy dispensing, and efficient storage. Choose from either 1x1 cm or 2x2 cm, each offering its own canvas for creativity
How to choose the perfect fit?If you have an artwork, check the size using Adobe Acrobat's 'Check Document Property' feature; find more info here If you do not have an Artwork file ready, feel free to use any one of the templates provided for the standard sizes.
ประเภทของกระดาษ
เลือกประเภทของกระดาษ
ข้อมูลและคำแนะนำExplore our diverse range of sticker materials, each uniquely tailored to cater to your specific needs and preferences.
Which material should I choose?Mirrorkote Stickers boast a glossy finish and reflective surface, adding vibrancy to designs, while Simili Paper Stickers offer a classic paper-like texture, ideal for indoor use with a rustic charm. Crafted from synthetic materials, our Synthetic Matte White Stickers feature a sleek and sophisticated matte finish, perfect for refined presentations, while our Synthetic Transparent Stickers provide a modern, transparent look suitable for seamless integration onto any surface, indoors or outdoors.
การเคลือบ
เลือกการเคลือบ
ข้อมูลและคำแนะนำ
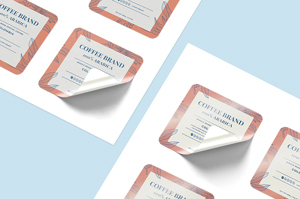
Wide selection of synthetic finishes is offered to elevate your product.
How to choose which finishing is suitable for you?Matte lamination offers a smooth, non-glossy feel, while glossy lamination provides a shiny finish. The spot varnish finishing is to highlight certain part of your artwork to draw more attention with a captivating glossy finish on specific spots.
Sticker Shape
เลือกSticker Shape
ข้อมูลและคำแนะนำOur product now offers Square and Rounded.
Which sticker shape should I choose?Each option brings unique design possibilities and functionality to suit diverse preferences and applications. Whether you prefer the classic elegance of rectangles, the soft edges of rounded stickers.
สี
เลือกสี
ข้อมูลและคำแนะนำWe offer CMYK (Full color) and spot color printing
What is the difference between CMYK and spot color printing?For Full Color On Front Only, we utilize CMYK. CMYK excels at creating a broad range of colors, making it ideal for variety of colors and complex designs. Alternatively, spot color printing offers precise hues for exact color matching or solid areas of color, especially applicable for logos or specific brand colors. Choose based on your design's complexity and color accuracy needs.
Sticker Orientation
เลือกSticker Orientation
ข้อมูลและคำแนะนำ
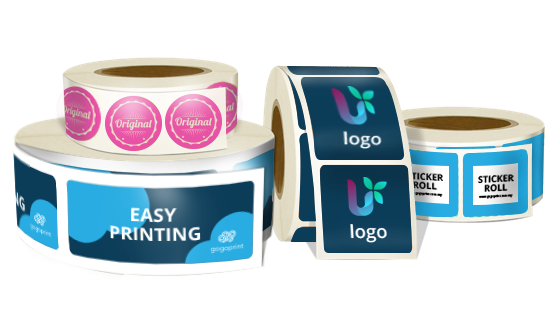
Our product now offers various sticker orientations to suit your specific needs.
What is the difference between the different sticker orientation?When it comes to sticker winding, you have the choice between outside wound and inside wound options. In outside wound stickers, the adhesive side faces inward, providing protection during storage and transportation, while inside wound stickers have the adhesive side facing outward, ready for immediate application. Whether you prioritize protection during storage or ease of application, we offer options tailored to your requirements.
Sticker Roll Size
เลือกSticker Roll Size
ข้อมูลและคำแนะนำ
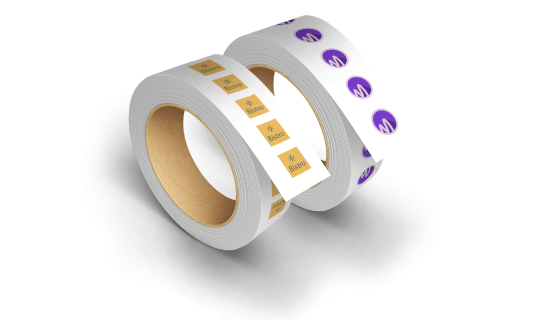
Our product now offers Roll With 3.8cm Core Size and Roll With 7.6cm Core Size.
Why does core size matter?Choosing the appropriate core size ensures compatibility with your printing machine, facilitating seamless integration and efficient printing processes. Whether you require a 3.8cm core size for compact machines or a 7.6cm core size for larger equipment, we provide options to accommodate your specific requirements.
ขั้นตอนที่ 2

เลือกจำนวนและวันจัดส่ง

กรุณาเลือกราคาด้านล่างเพื่อตรวจสอบกำหนดการตัดรอบ เพื่อที่คุณจะได้รับสินค้าตามที่ต้องการ
จำนวน
วันรับสินค้า
Tue, 6 Aug
วันรับสินค้า
Wed, 7 Aug
วันรับสินค้า
Mon, 12 Aug
1,000 ชิ้น
2,000 ชิ้น
5,000 ชิ้น
10,000 ชิ้น
20,000 ชิ้น
50,000 ชิ้น
100,000 ชิ้น
200,000 ชิ้น
500,000 ชิ้น
1,000,000 ชิ้น
หากคุณไม่พบจำนวนสินค้าที่คุณต้องการ คุณสามารถกำหนดจำนวนชิ้นได้ด้วยตัวเองตามต้องการ
Set Custom Quantity

Product's quantity must be more than 1,000 ชิ้น and less than 1,000,000 ชิ้น. In the multiples of 1,000

Important Customer Information about ordering Sticker Rolls

  • For transparent, silver or special materials, white ink is not available for CMYK printing, if you would like to print your artwork with white ink please select either "Spot Color printing" option or the "CMYK + Spot Color printing" option
Information
Artwork Preparation

  • 1. Add 3 mm of bleed

    During the production of paper products, slight cutting imperfections are to be expected - cutting can be off by a couple of millimeters from the cutting line. To allow leeway for such imperfections, you should add 3 mm of bleed on all edges of your artwork. Make sure all colors, background pictures, and elements extend to the edge of the bleed area, to avoid the appearance of white borders on certain edges after cutting. Learn more how to set up the bleed here.

  • 2. Keep your content within a 3 mm safety margin

    To ensure that no important elements (text, graphics, images) get cut off from your paper product, make sure to keep such elements at least 3 mm away from the edge of your finished product dimensions. Click here to know how to set up 3 mm safety margin.

  • 3. Use a combination of CYMK and spot colors only

    Make sure that the colors in your artwork match the configuration of your order. Our n can be printed in full CMYK colors, in spot colors, or in a combination of both. The number of spot colors used in your artwork has to match the configuration of your order, otherwise an additional charge may apply.

  • 4. Use an image resolution of at least 300 DPI

    To avoid blurriness, use only images and graphics that have a resolution of 300 DPI or more at actual size. Before sending your files, make sure to embed your images into the file. Read more about how to check the resolution of your assets.

  • 5. Use the right values for grey elements

    When setting up grey elements, set the black color (K) to a percentage between 0 and 100, and keep all other colors (C, M, and Y) equal to 0%.

  • 6. Use the right values for black elements

    When setting up black text, thin lines and small elements, use pure black, (i.e. C = 0, M = 0, Y = 0, K = 100). Text, thin lines, and small elements in pure black colour should be set to overprint to avoid white gaps around the text. It will give a solid edge to those elements.

  • 7. Use maximum 2 colours for lines that are finer than 2 pt

    If lines are 2 pt thick or less, use only 1 or 2 colours. 4 colours may be used for thicker lines.

  • 8. Convert all fonts to outlines, or embed them in your file

    To avoid issues with fonts when submitting your file(s), make sure to convert fonts to outlines, or to embed all fonts when saving to PDF.

  • 9. Save and upload your artwork files as PDF/X-1a

    The best format for submitting print-ready files is PDF, under the PDF/X-1a standard. Where possible, submit your files in PDF format.

  • 10. Check for overprint

    Make sure that no elements are set on overprint, unless you need them to be.

  • 11. Include a die-cut layer

    For products that include die-cutting, include a die cut layer in the artwork file.

Templates
FAQ

  • 1. How many stickers fit on a roll?

    The number of stickers that fit on a single roll will depend on the size of the stickers. In most cases all stickers will fit on a single roll.

  • 2. Which production techniques are used?

    Our n are offset printed to guarantee the best printing quality.

  • 3. How will my product be delivered?

    All of our products are delivered in a securely packed cardboard box.

  • 4. I can't find what I'm looking for. Can I request a quote?

    If you can't find what you need, please call our customer service team at the above-mentioned number to help you place an order. You can also request a quote from our customer service team for special product configurations that are not available on our website.

  • 5. How can I upload my files?

    Your file can be uploaded either before you checkout and pay, or after. Please note that uploading files late might result in a moved expected delivery date.

  • 6. Which formats can I upload?

    The best format for submitting print-ready files is PDF, under the PDF/X-1a standard. However you can also upload your file in JPEG, PNG, PSD, EPS, TIFF or AI format for an additional fee of AUD 10.00. Our graphic designers will then convert your file into a print-ready PDF file.

Guides and Tools

Everything you need to know to get your Artwork ready

  • 1. Add 3 mm of bleed

    During the production of paper products, slight cutting imperfections are to be expected - cutting can be off by a couple of millimeters from the cutting line. To allow leeway for such imperfections, you should add 3 mm of bleed on all edges of your artwork. Make sure all colors, background pictures, and elements extend to the edge of the bleed area, to avoid the appearance of white borders on certain edges after cutting. Learn more how to set up the bleed here.

  • 2. Keep your content within a 3 mm safety margin

    To ensure that no important elements (text, graphics, images) get cut off from your paper product, make sure to keep such elements at least 3 mm away from the edge of your finished product dimensions. Click here to know how to set up 3 mm safety margin.

  • 3. Use a combination of CYMK and spot colors only

    Make sure that the colors in your artwork match the configuration of your order. Our n can be printed in full CMYK colors, in spot colors, or in a combination of both. The number of spot colors used in your artwork has to match the configuration of your order, otherwise an additional charge may apply.

  • 4. Use an image resolution of at least 300 DPI

    To avoid blurriness, use only images and graphics that have a resolution of 300 DPI or more at actual size. Before sending your files, make sure to embed your images into the file. Read more about how to check the resolution of your assets.

  • 5. Use the right values for grey elements

    When setting up grey elements, set the black color (K) to a percentage between 0 and 100, and keep all other colors (C, M, and Y) equal to 0%.

  • 6. Use the right values for black elements

    When setting up black text, thin lines and small elements, use pure black, (i.e. C = 0, M = 0, Y = 0, K = 100). Text, thin lines, and small elements in pure black colour should be set to overprint to avoid white gaps around the text. It will give a solid edge to those elements.

  • 7. Use maximum 2 colours for lines that are finer than 2 pt

    If lines are 2 pt thick or less, use only 1 or 2 colours. 4 colours may be used for thicker lines.

  • 8. Convert all fonts to outlines, or embed them in your file

    To avoid issues with fonts when submitting your file(s), make sure to convert fonts to outlines, or to embed all fonts when saving to PDF.

  • 9. Save and upload your artwork files as PDF/X-1a

    The best format for submitting print-ready files is PDF, under the PDF/X-1a standard. Where possible, submit your files in PDF format.

  • 10. Check for overprint

    Make sure that no elements are set on overprint, unless you need them to be.

  • 11. Include a die-cut layer

    For products that include die-cutting, include a die cut layer in the artwork file.

  • 1. How many stickers fit on a roll?

    The number of stickers that fit on a single roll will depend on the size of the stickers. In most cases all stickers will fit on a single roll.

  • 2. Which production techniques are used?

    Our n are offset printed to guarantee the best printing quality.

  • 3. How will my product be delivered?

    All of our products are delivered in a securely packed cardboard box.

  • 4. I can't find what I'm looking for. Can I request a quote?

    If you can't find what you need, please call our customer service team at the above-mentioned number to help you place an order. You can also request a quote from our customer service team for special product configurations that are not available on our website.

  • 5. How can I upload my files?

    Your file can be uploaded either before you checkout and pay, or after. Please note that uploading files late might result in a moved expected delivery date.

  • 6. Which formats can I upload?

    The best format for submitting print-ready files is PDF, under the PDF/X-1a standard. However you can also upload your file in JPEG, PNG, PSD, EPS, TIFF or AI format for an additional fee of AUD 10.00. Our graphic designers will then convert your file into a print-ready PDF file.